Auto-apply in Get Offer finds jobs that match your criteria and sends your chosen resume with a cover letter. Setup starts with your hh.ru account; after that, you set the search criteria, cover letter, limit and schedule separately. This guide was checked against the web interface on 22 September 2026. The six screenshots show the Russian version of the interface (the English one has the same layout) and use demo data: the names, jobs and numbers are made up, and no real applications were sent while preparing this guide.
1. Sign in and connect your hh.ru account
Open Auto-apply in your account. If you’re asked to sign up or sign in, come back to Auto-apply afterwards. Whether the feature is available depends on your current plan; if your plan doesn’t include it, the section tells you which plans do. Creating a Get Offer account doesn’t connect your hh.ru profile by itself.
On the hh.ru accounts tab, click “Connect hh.ru”. Enter the phone number or email of the account you want to apply from. Wait for hh.ru to respond, then enter the one-time code on the next step. If hh.ru asks for an extra check, complete it in the form shown. Don’t send the code to support or anyone else. If something goes wrong, read the error message first instead of retrying the connection over and over.
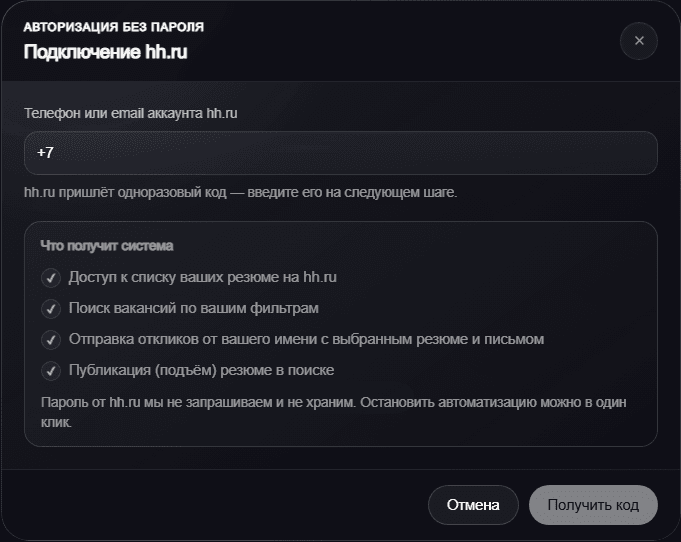
Once connected, check the account shown and its list of resumes. If the list is empty, make sure you signed in to the right profile and click “Sync”. Don’t create a filter at random: the resume you select is the one attached to your applications. Changes on hh.ru may show up in the interface only after the data refreshes, so before you start, check that the resume’s title and availability are up to date.
2. Choose a resume, limit and schedule
Open the Auto-apply tab, click “Set up auto-apply” and fill in the “Basics” section. The filter name is for you: include the role, region or another distinguishing detail. In the “Resume to apply with” field, choose the resume for that direction. If you’re looking for several different roles at once, create separate, clearly named filters and check that each one uses the right resume.
The current form has two sending modes: “Right away” and “Throughout the day”. The first processes matching jobs one after another as they’re found; the second spreads applications across the active window. The “Applications per day” field accepts a value from 1 to 100. It’s the filter’s upper limit, not a promise to send exactly that many: there may be fewer matching jobs, and hh.ru and your account may have additional limits.
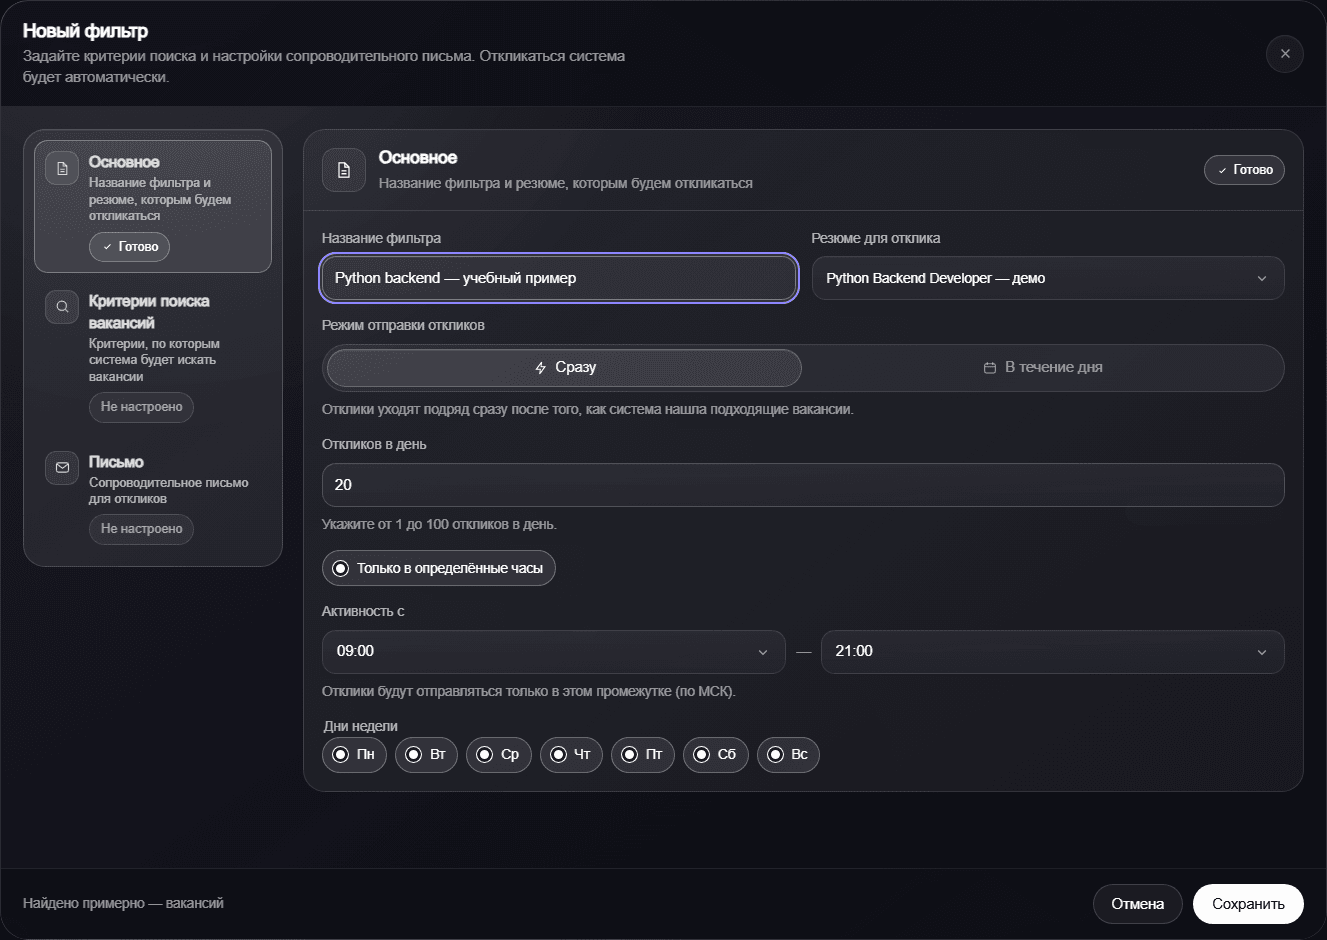
The “Only during set hours” toggle reveals the start and end of the active window. The hint in the interface says the times are Moscow time (MSK). Underneath, you choose the days of the week. Before saving, match these values against your own time zone. If you have several filters, remember that they run together: adding more filters doesn’t lift hh.ru’s limits on your account.
3. Set your job criteria
Go to the “Job search” section and click “Set up search”. You can start with a ready-made query such as Python Backend and then refine it. Check the “Search in” options: job title, company name or job description. The same text gives different results in different fields. Add requirements gradually; otherwise, too narrow a combination of conditions can leave the filter with no jobs at all.
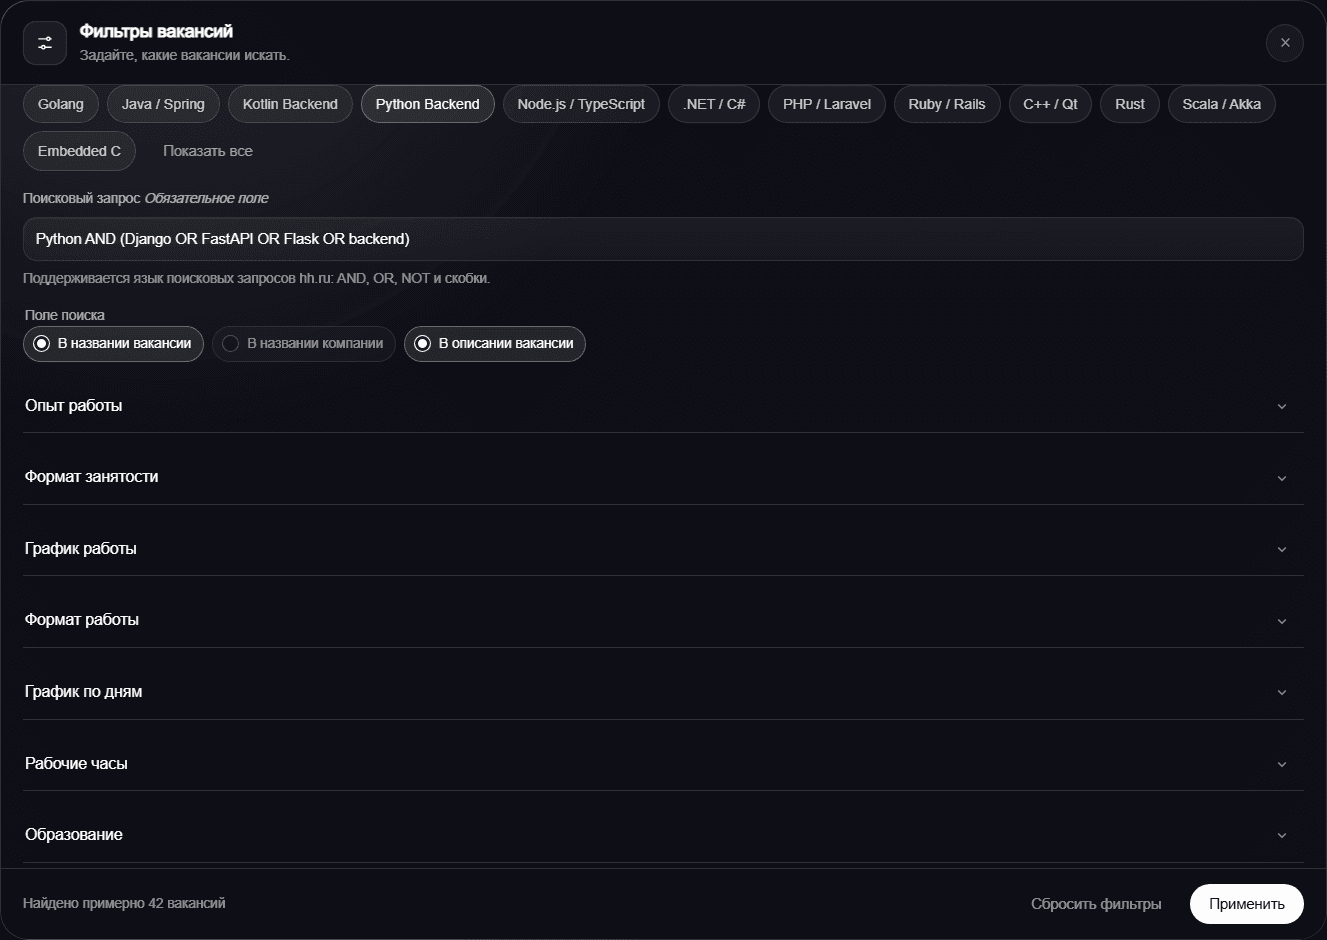
The panel has groups of conditions for work experience, employment type, schedule and work format, plus additional restrictions. “Stop words” help exclude irrelevant jobs, and “Company stop list” takes company names separated by commas. Check the spelling and which jobs actually get selected. Don’t treat the stop list as a legal or technical guarantee that every variant of an organization’s name will be excluded.
When you’re done, apply the conditions and go back to the filter. The estimated number of jobs helps you spot a search that’s too broad or returns nothing, but it isn’t the number of applications that will be sent. The results may include jobs that were already processed, jobs with application restrictions or jobs skipped for other reasons. It’s better to fix an obvious query mistake before launch than to judge a filter only by a large number of results.
4. Prepare a cover letter
In the “Cover letter” section, choose an available mode: “No message”, “Templates” or “AI”. For templates, fill in at least one version. Use specific facts: your relevant stack, a problem you solved and a clear reason you’re interested in the role. Don’t add achievements or numbers you can’t explain in an interview. Before saving, check the greeting and the role title, and make sure no notes to yourself are left in the text that will be sent.
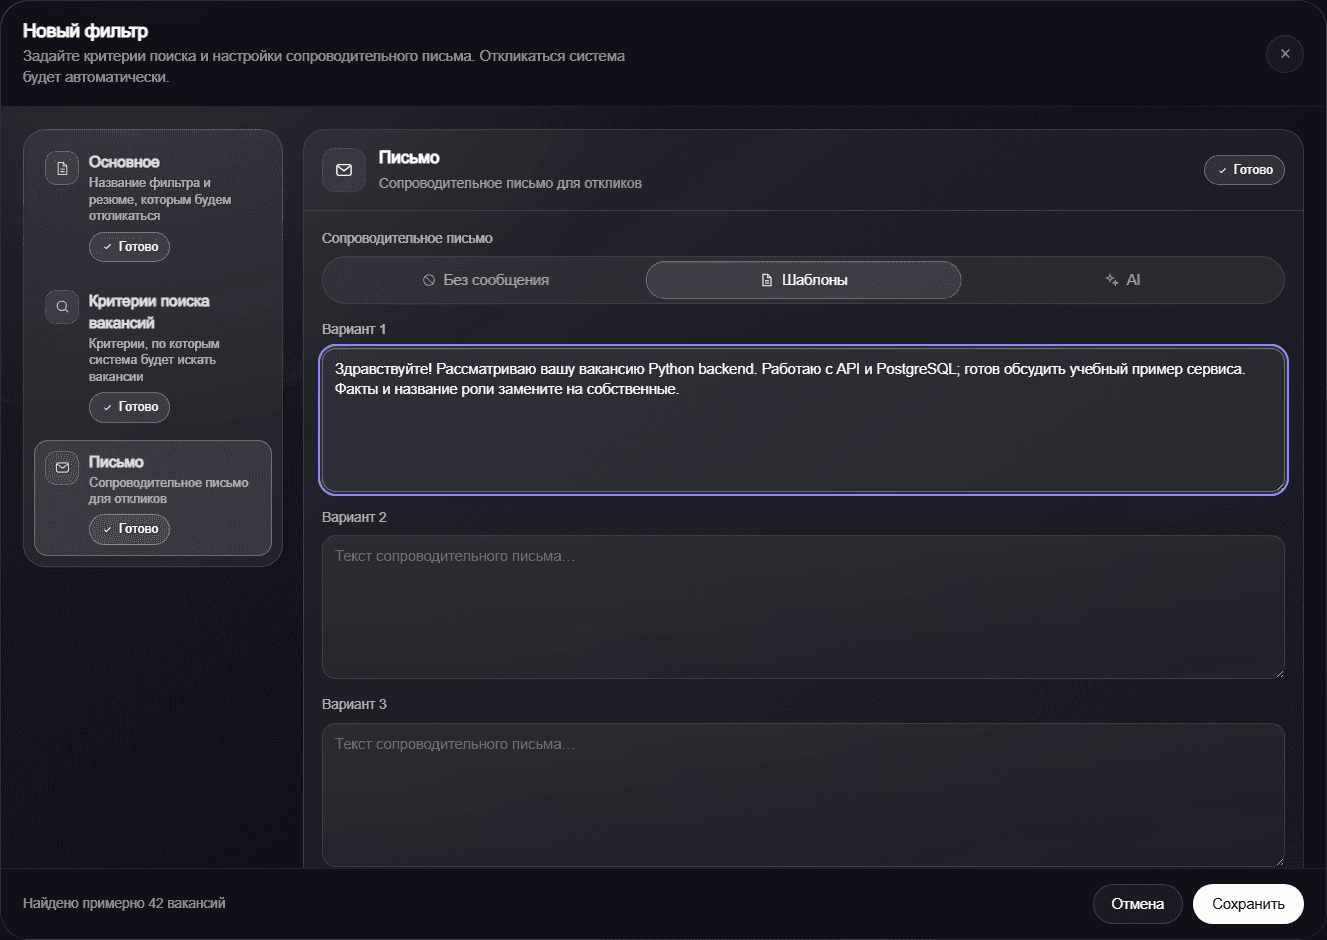
The interface supports placeholders for the job title, company, region and salary, as well as phrase options. Use them only where the sentence still reads naturally. The AI mode needs a quality check too: generating a letter doesn’t prove that it describes your experience accurately. Build every letter on the “job plus your own facts” principle; you can edit the templates at any time in Auto-apply.
5. Save the filter and check the log
Before saving, double-check the account, resume, search query, limit, days and hours. Saving a working filter with “Turn on auto-apply” can let the automation run with its settings. You don’t need to start mass applying just to get to know the interface: go through the fields and the letter first, and turn auto-apply on only after checking them. If your circumstances change, pause the automation and edit the relevant filter.
The “Application history” button opens the history, which you can filter by status, source and period. In the screenshot below, one sample row has the status “Application sent”. It means the application was sent, not that you were invited to an interview or that the employer read it. The total number of jobs found, the number of applications sent and the review outcomes are different metrics; you can’t add them up into a single success rate.
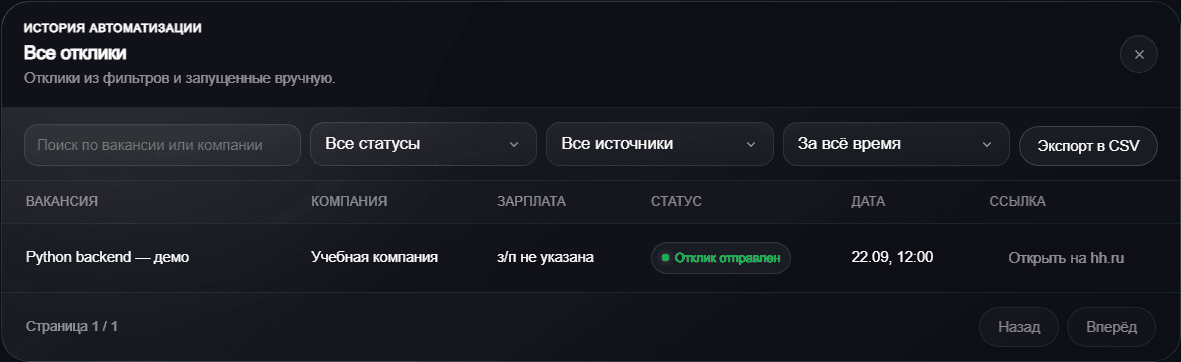
- “Found”: the job has entered processing.
- “Checking delivery”: sending hasn’t been confirmed yet.
- “Application sent”: the application has been sent to hh.ru.
- “Rejected by employer”: the employer’s review returned this status.
- “Rejected”, “Processing error” and “Repeat application” mean you should read the reason; none of them is a successful new application.
6. Pause when needed and look into the reasons
The hh.ru accounts tab has a “Pause all auto-apply” action. Use it to stop the automation while you change your resume or criteria, or when you’ve finished your search. After pausing, check the status shown. Applications already sent don’t disappear from hh.ru. Disconnecting the account is a separate action with its own description of the consequences; don’t use it instead of pausing unless you really need to.
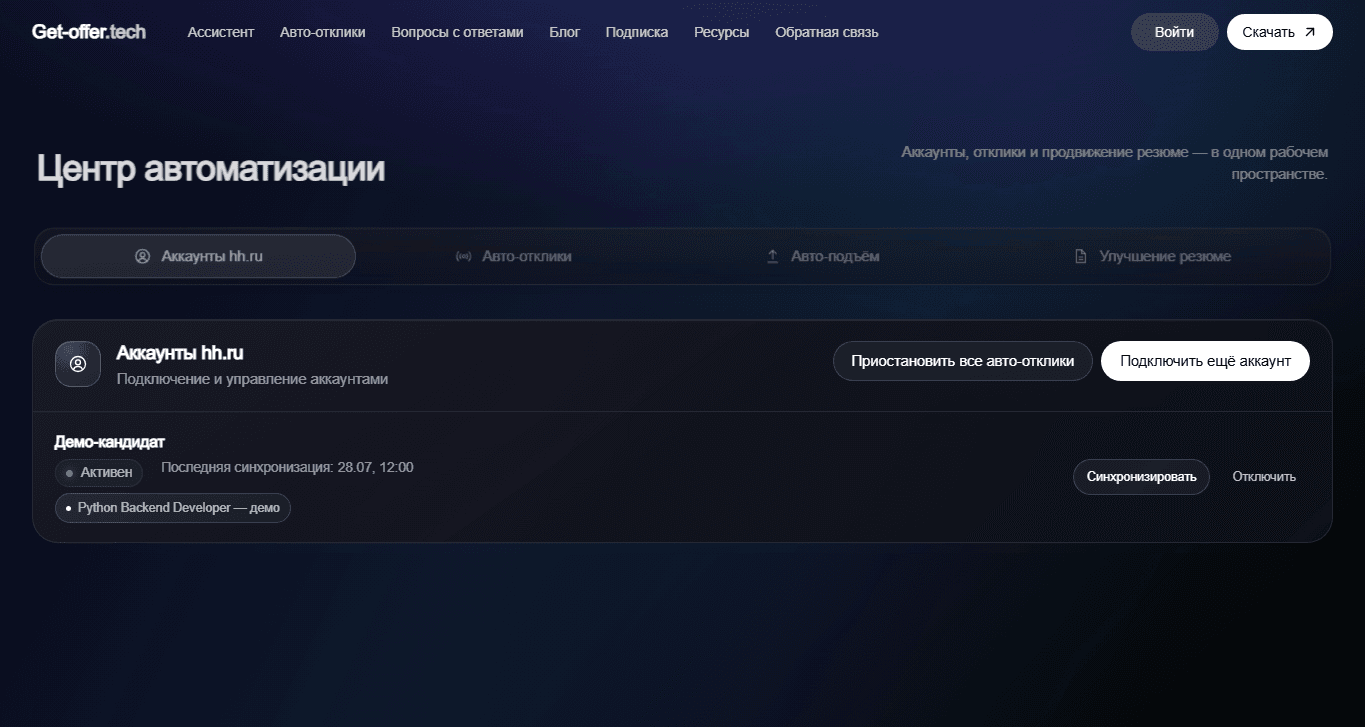
If nothing is being sent, check that the account is available, whether automation is paused, whether the filter is on, the schedule and the search results. Then open the log and read why specific jobs were handled the way they were. Don’t raise the limit by reflex: zero results may simply mean there are no new matching jobs. For support, note when the problem happened, the section name and the error with personal details removed. Don’t share one-time codes, tokens or other people’s messages.
Further reading
- hh.ru auto-apply in your account
- Prompts to improve your resume with AI
- Plans and limits are shown in your account